
Hello! I’m so excited to FINALLY start my own blog!
It’s been on my mind for a long time but I kept putting it off. Since this is my first blog post I wanted it to be something I’m most passionate about these days. Planners! and not just any planner but a ‘Midori‘ a.k.a. Traveler’s Notebook. A Midori is basically a piece of leather with elastic to hold notebooks or paper inserts to write, plan or journal.
Although I consider myself to be an organized person, I’d never owned a proper planner until last year. My planning system consisted of To Do lists on random pieces of paper, which I found around the house. I guess I inherited this trait from my loving mom, who mostly used the back of greeting cards and (used/old) envelopes for her endless lists. I’m sure many can relate! It was the social media that enticed me with images and videos of their beautiful and expensive planners and become part of the ‘Planner Community’. It was here that I discovered and fell in love with the Traveler’s Notebook.
The original ‘Midori’ is made from genuine leather and costs between $35 to $50 dollars! Ouch! Needless to say, I wasn’t planning on spending so much on something I could easily make myself. It also gave me an excuse to run to my favorite craft store, yet again! I decided to go with vinyl instead of genuine leather since its much cheaper and easily available in craft stores.
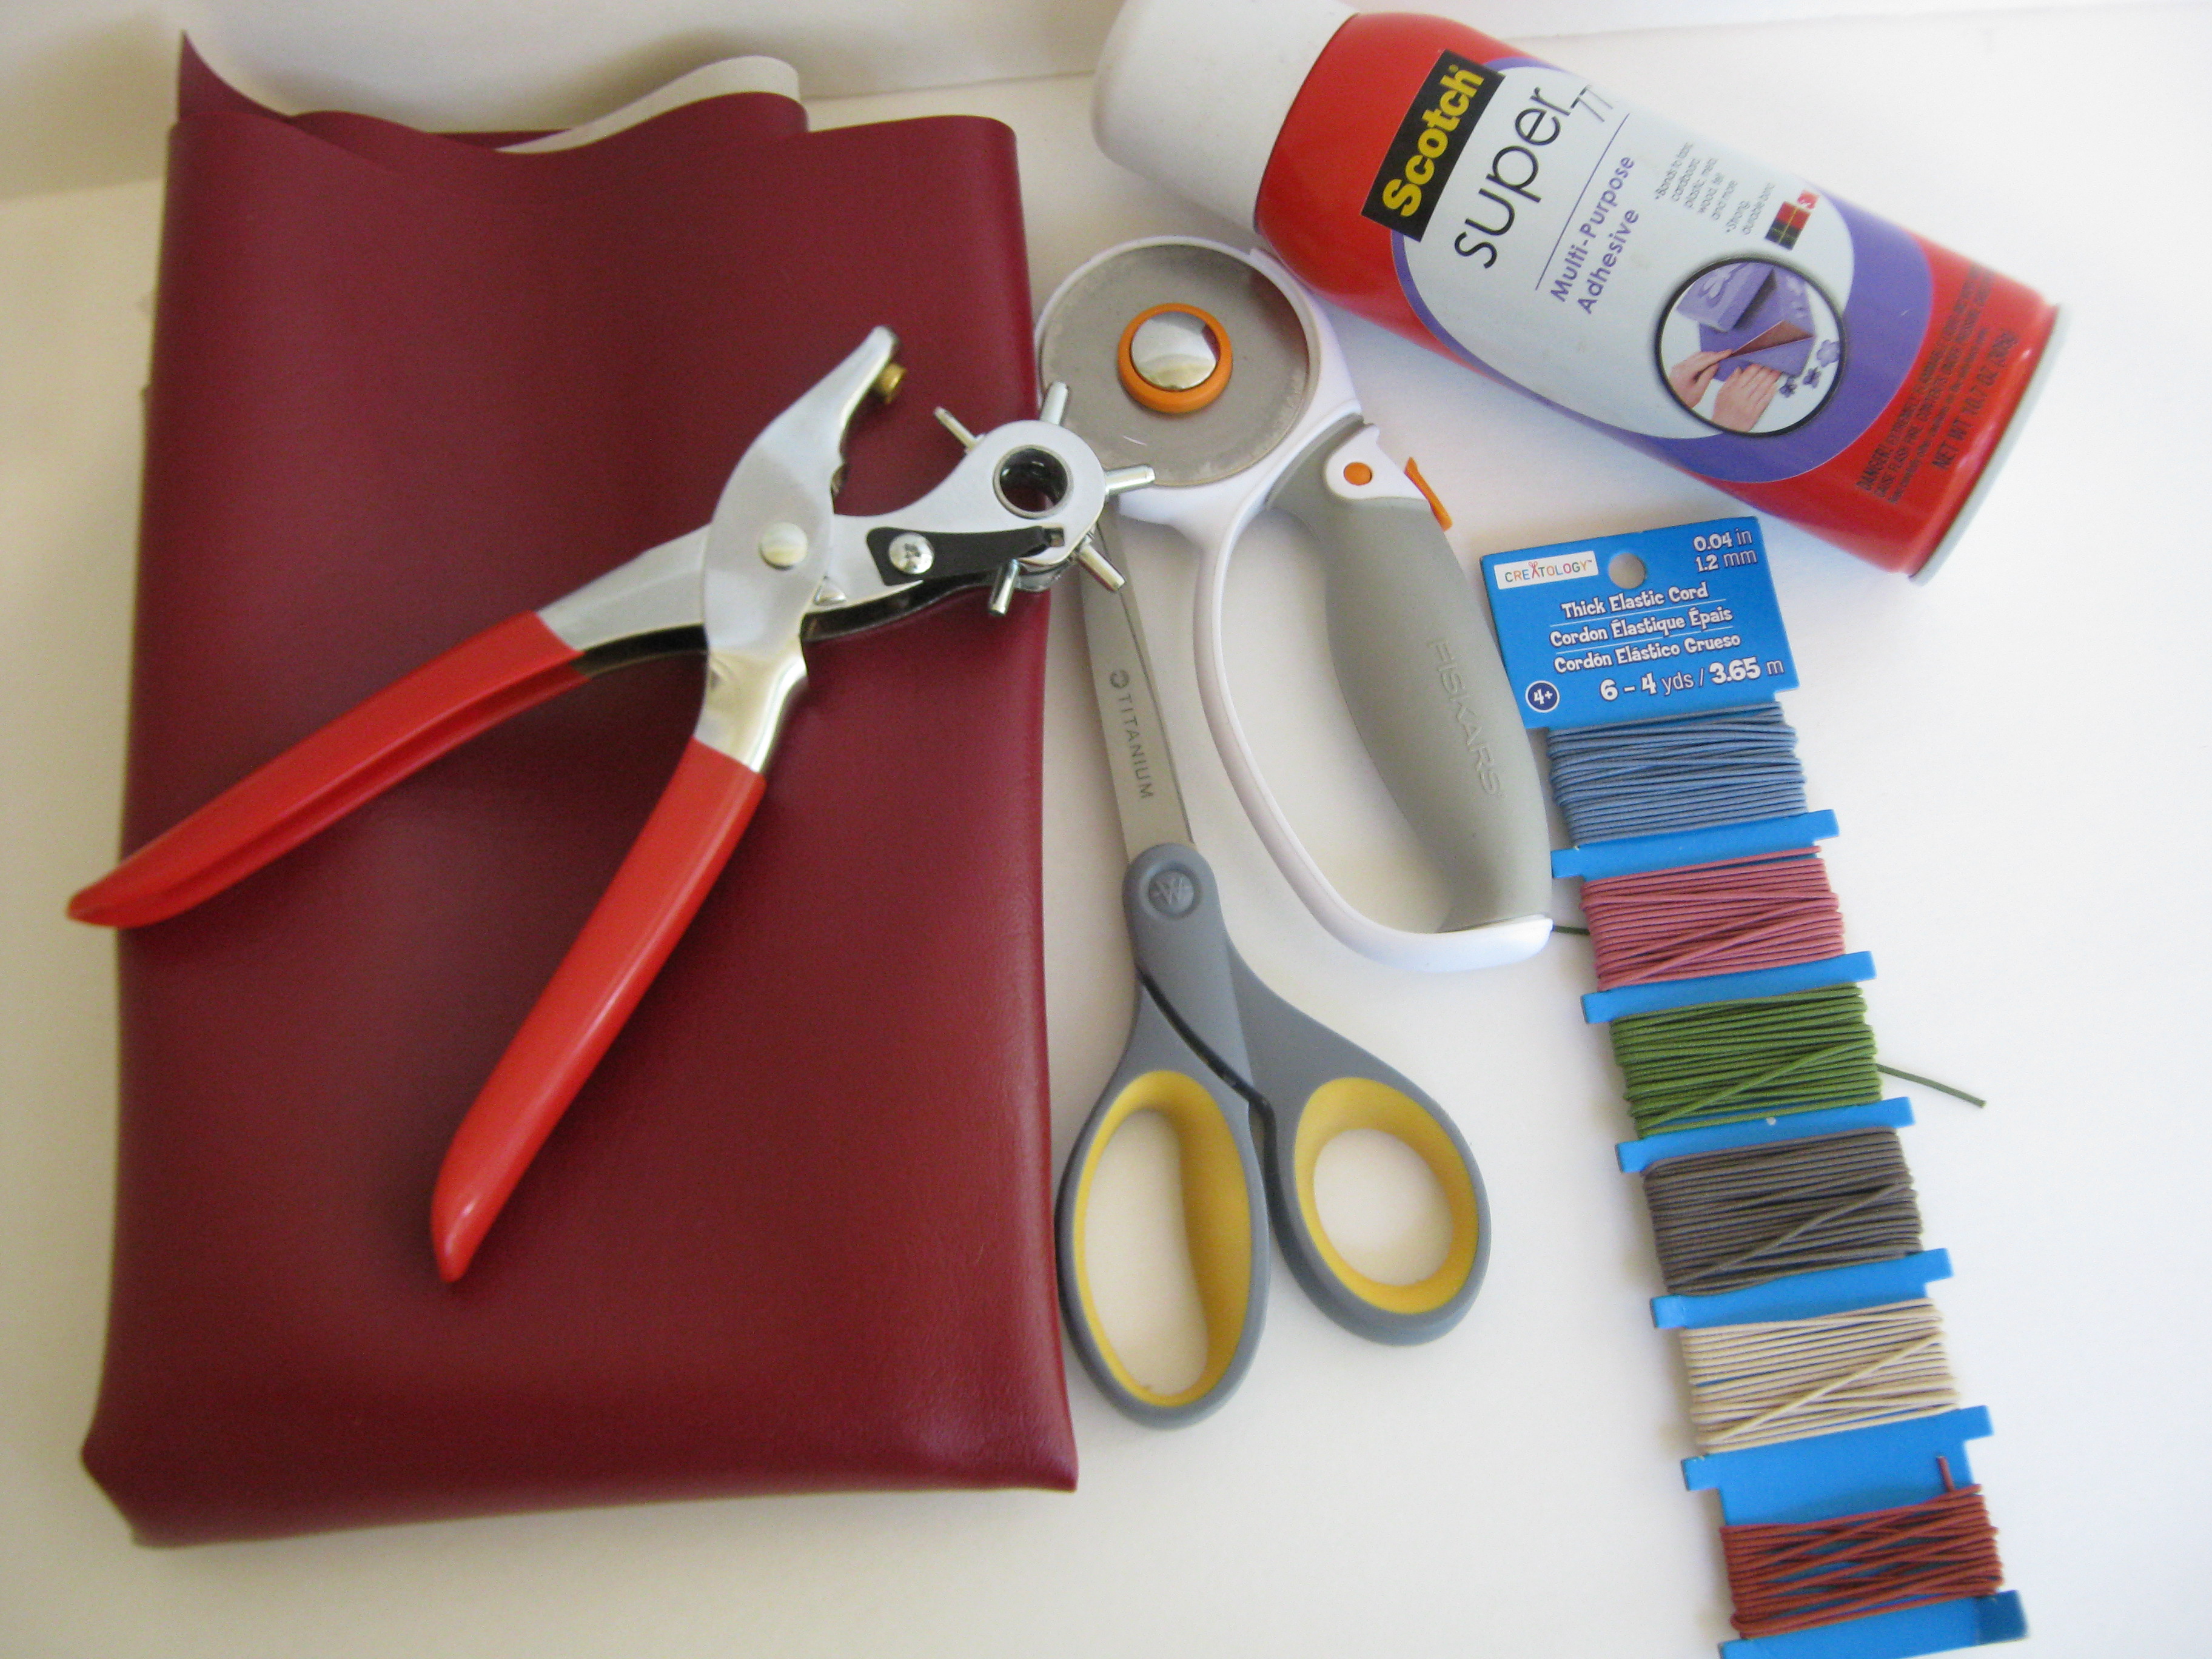
Lets get started with the things you’ll need:
2 pieces of Leather or vinyl (I chose vinyl ) 8.5″x 11″
Spray adhesive
Rotary cutter or scissors
Cutting Mat (if using a rotary cutter)
Thick Elastic Cord (about a yard)
Leather puncher or nail and hammer
Notebooks. I used Moleskin notebooks. If you plan to use any other cheaper kind you should adjust the measurement accordingly
Charm/beads (optional)

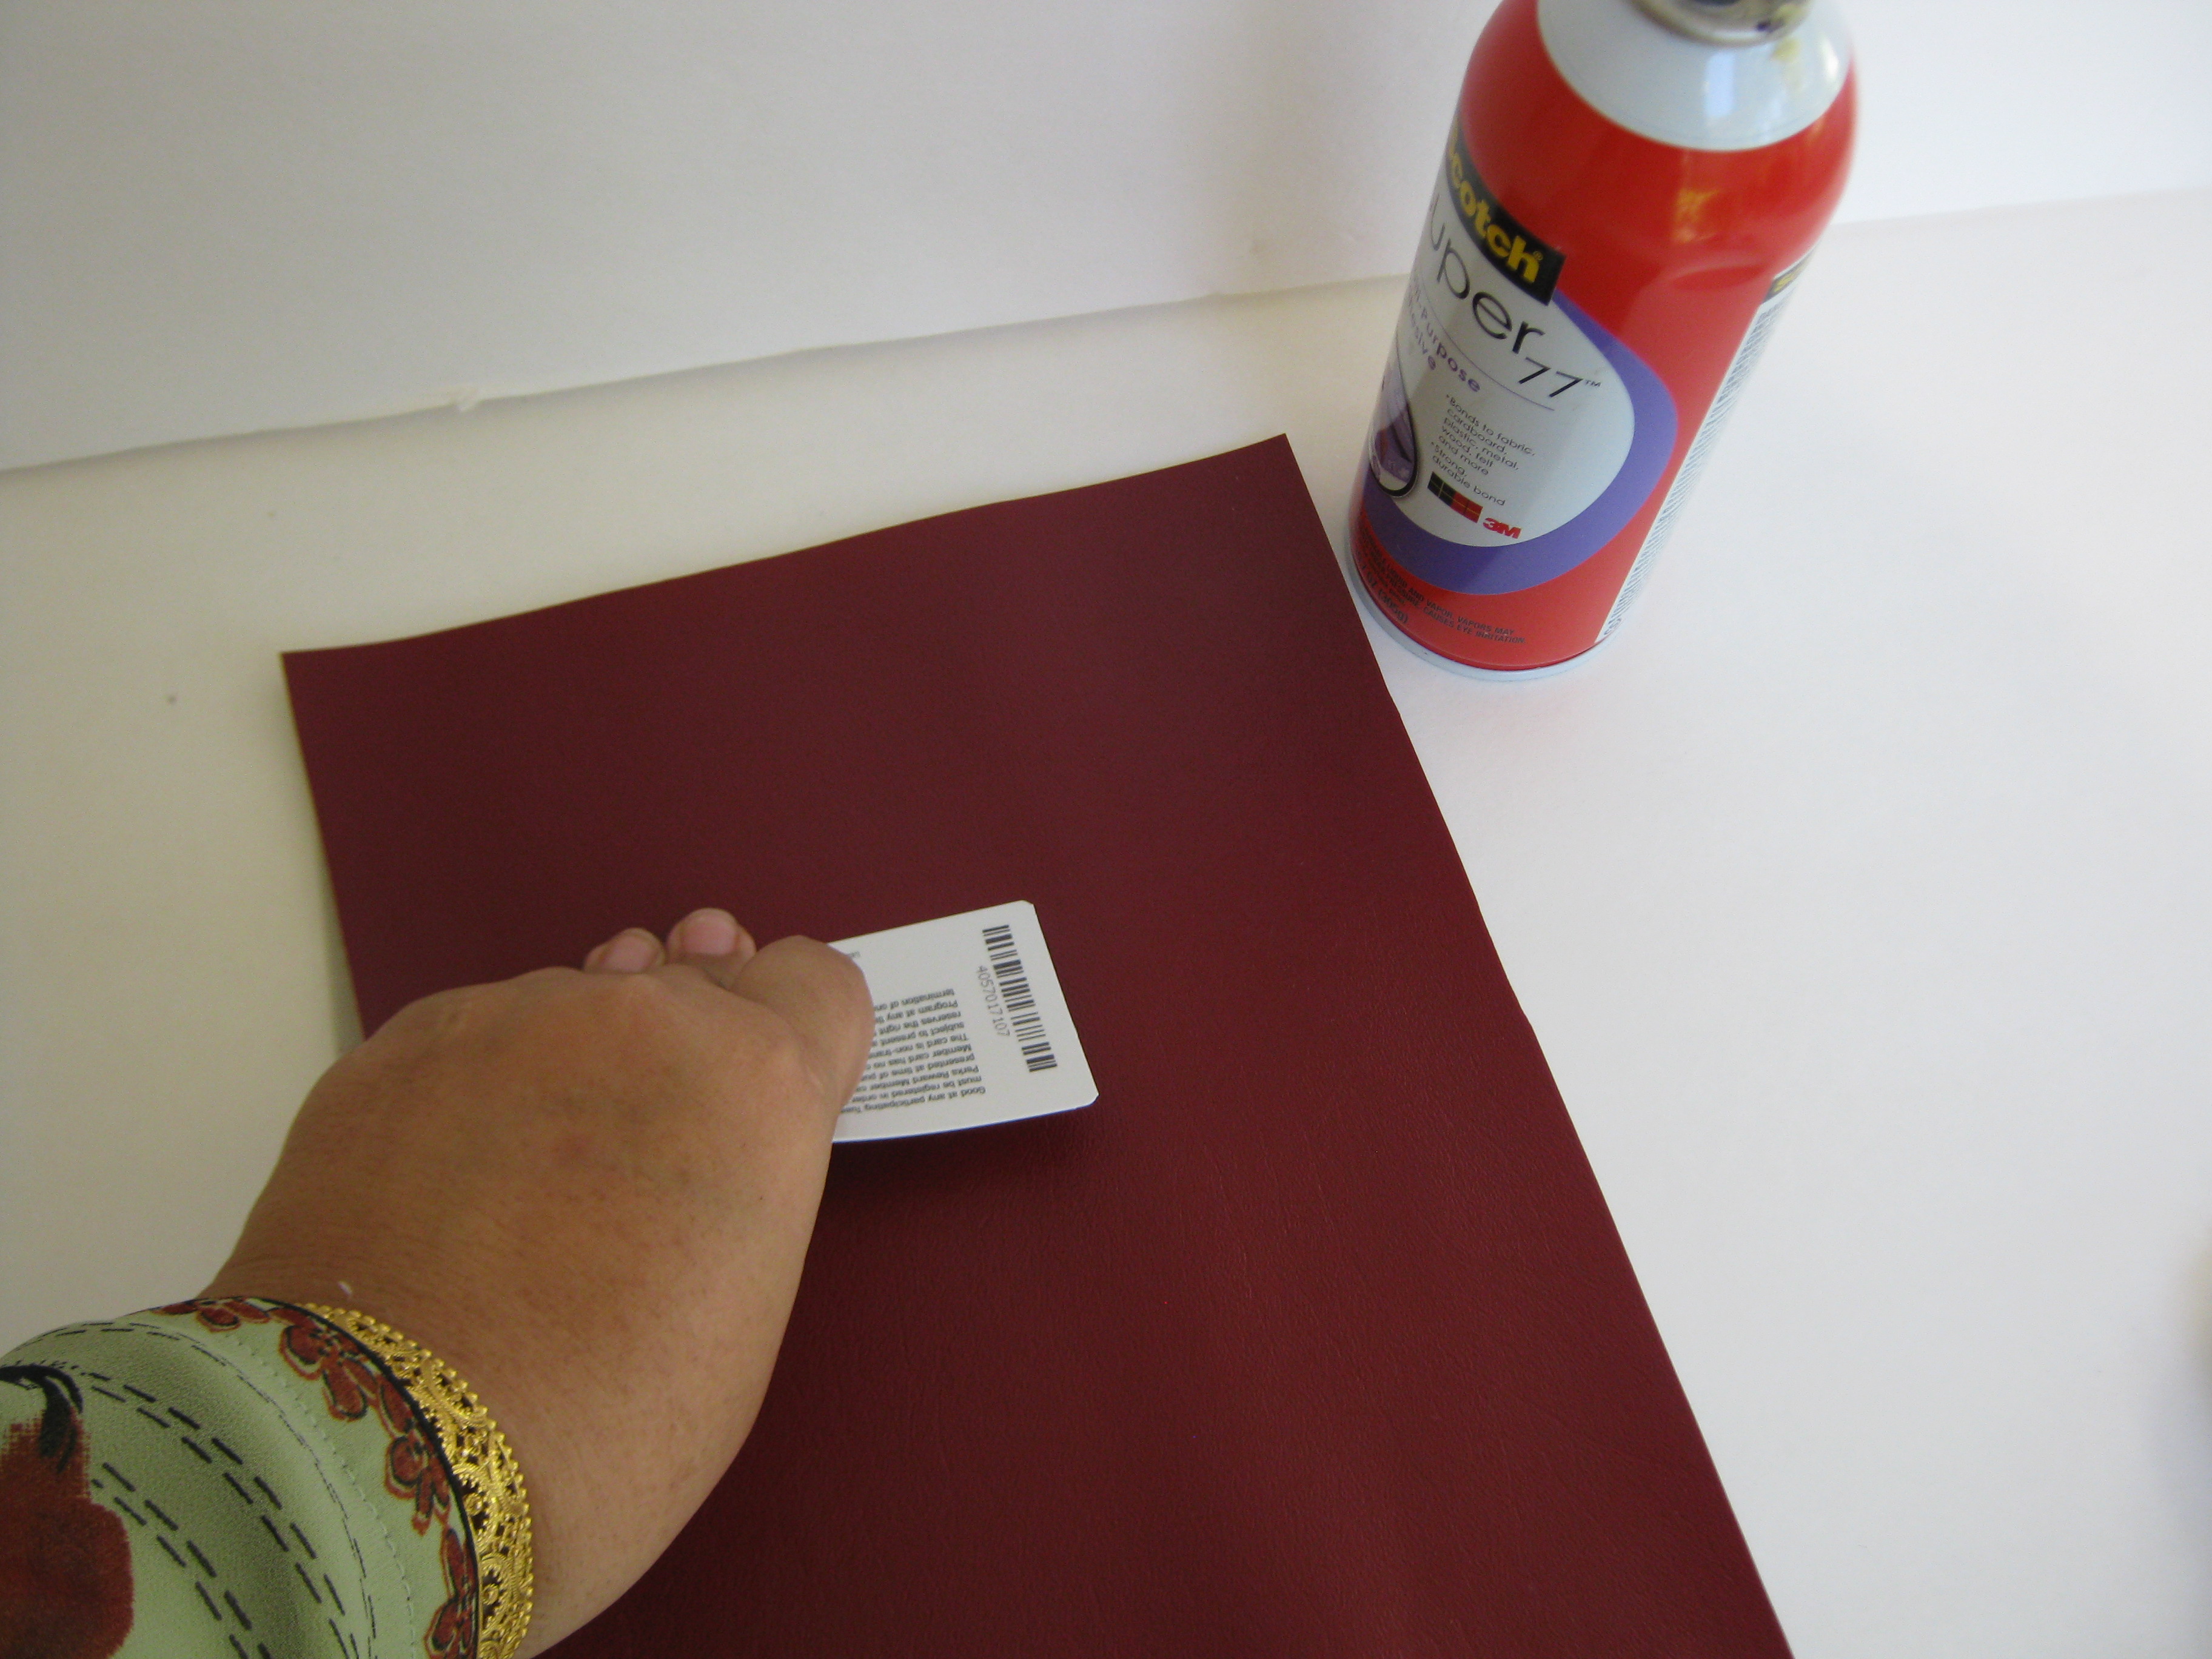
Measure and cut two pieces of vinyl. Take one piece of vinyl and spray it with the adhesive on the wrong side. Take the other piece of vinyl and place it on top of the first one right side up. Press down firmly and smooth it out with a ruler or an old credit card. This makes the vinyl thicker and less floppy. If you like the floppy style you can skip this step.

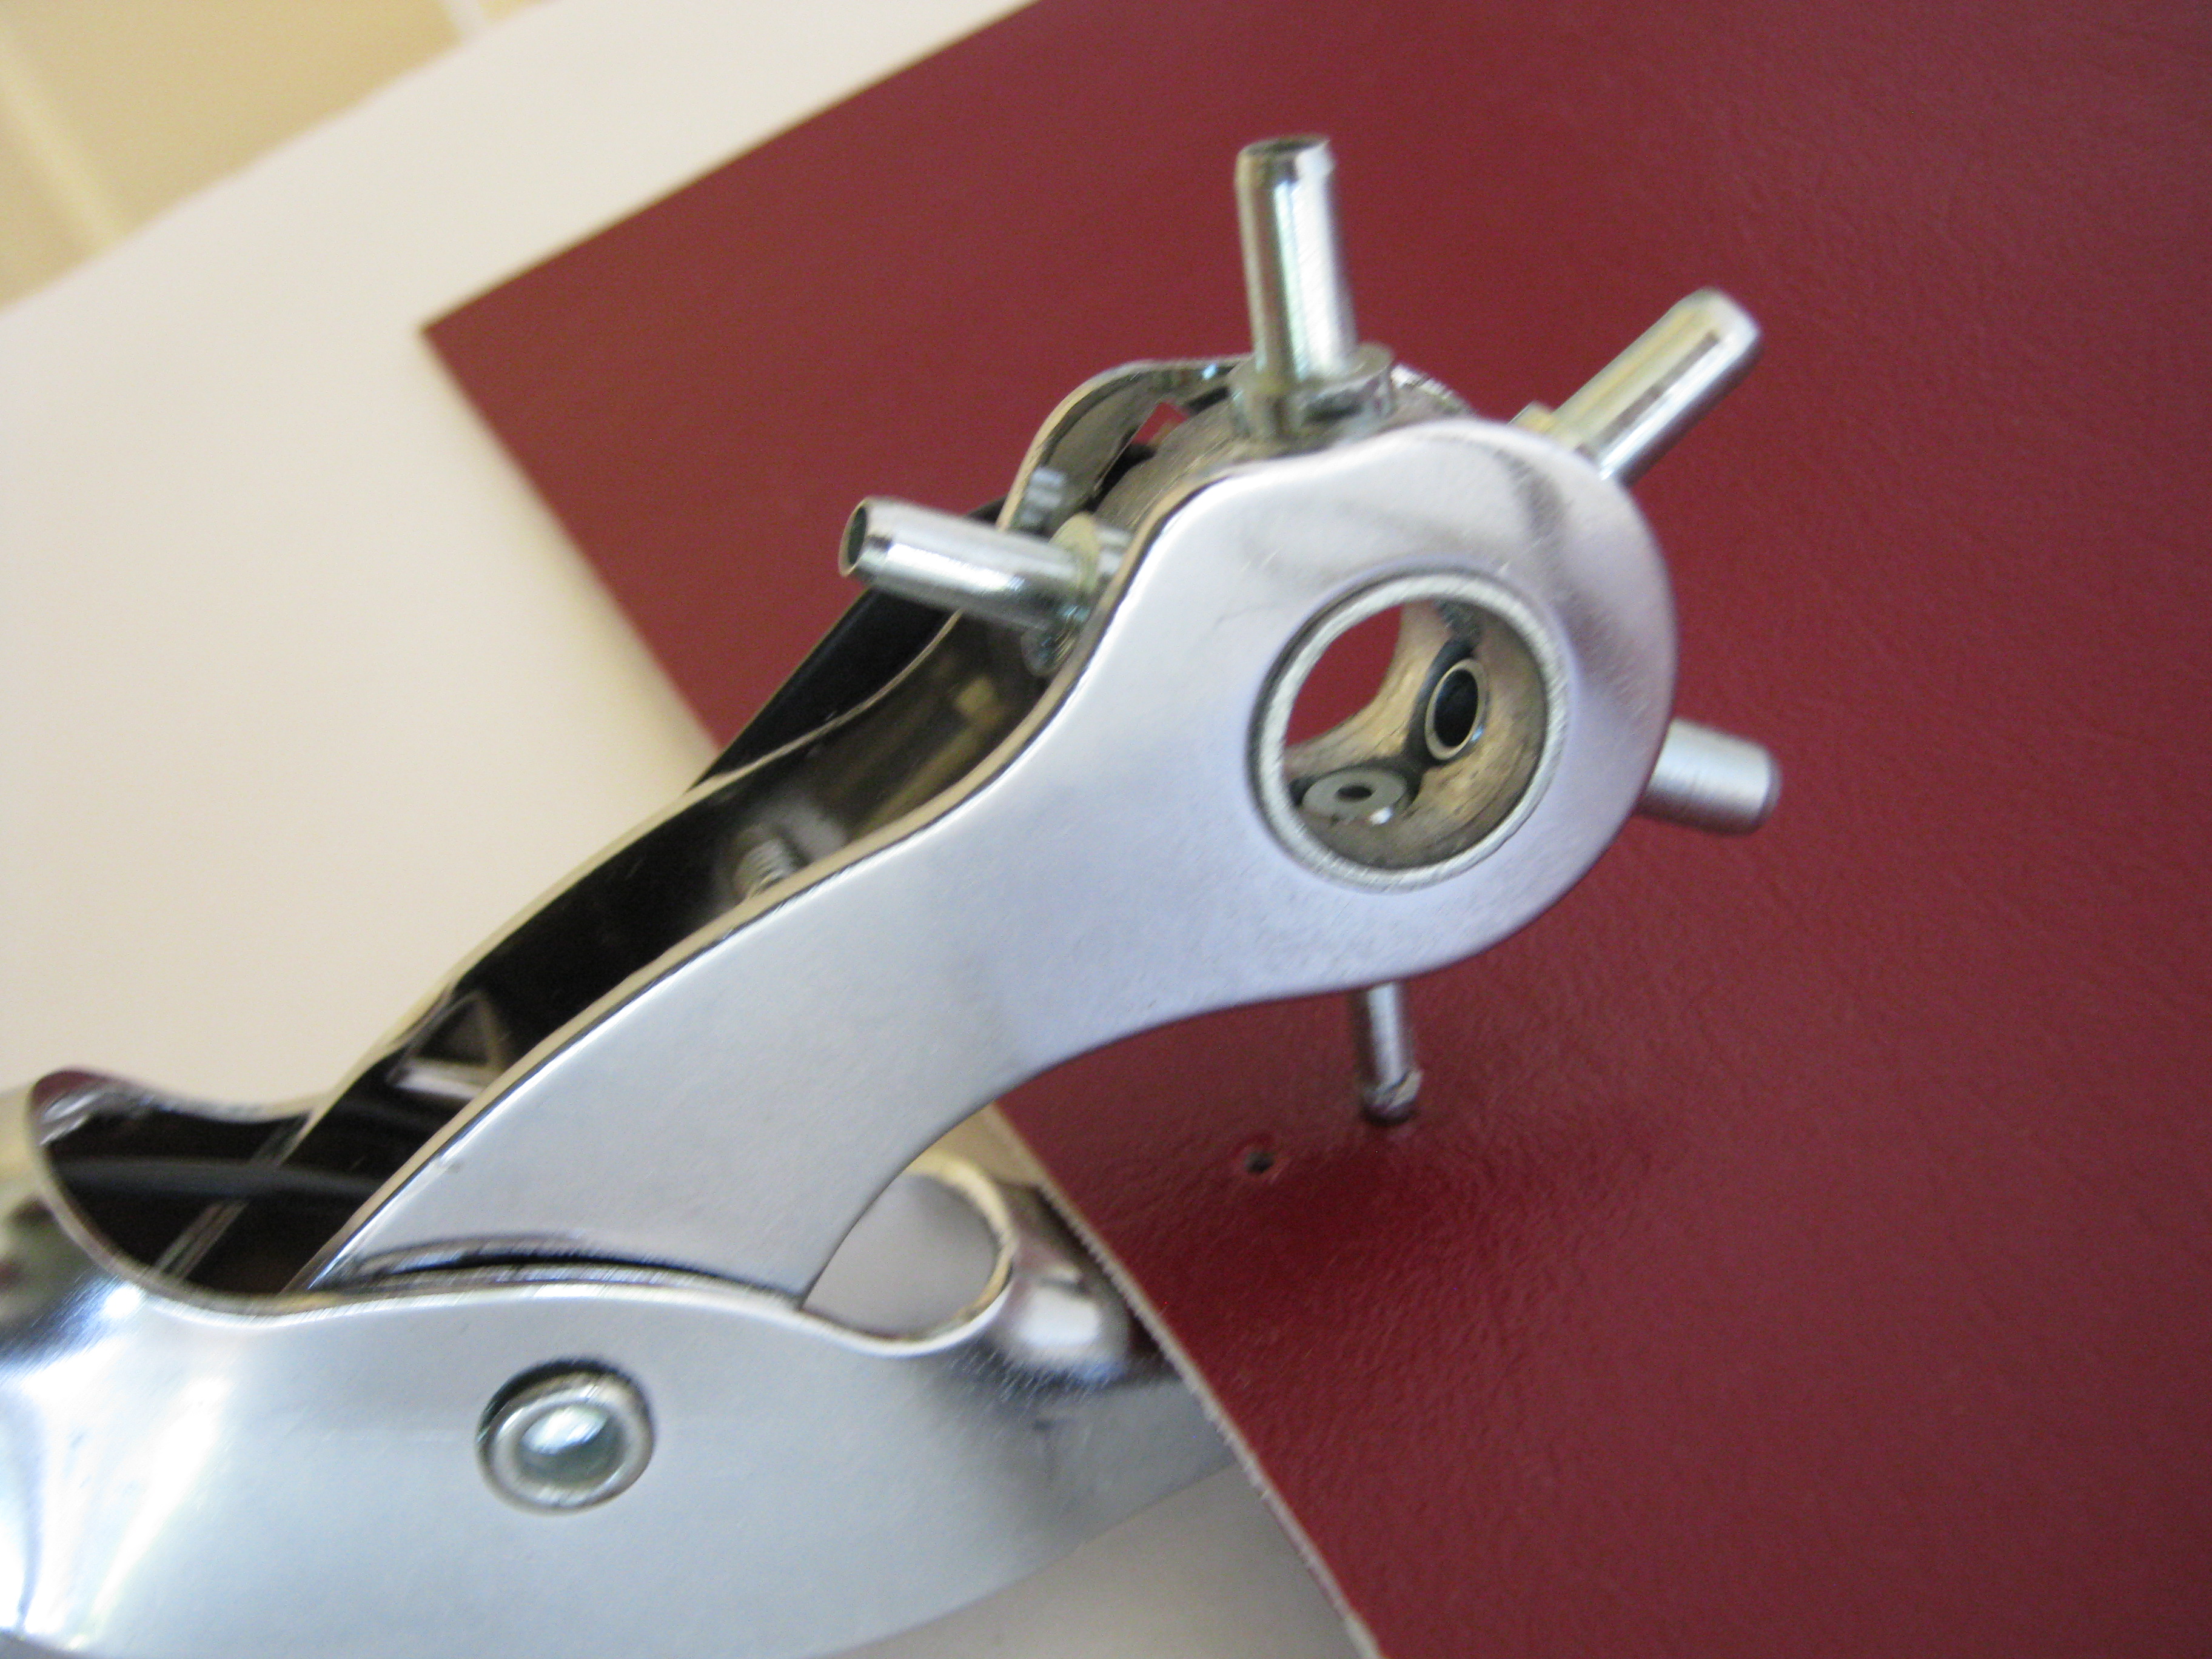
Next, measure the center of the vinyl and punch one hole in the center, and two each on both ends of the vinyl spine. The top and bottom holes are used for stringing the elastic cord to hold your notebook inserts together. The elastic in the middle is used as a closure to hold everything together. If you plan to make several of these, I suggest you invest in a leather puncher, otherwise, any piercing tool/nail is sufficient to make the holes.
The structure of your TNB (Traveler’s Notebook) is now complete. Simple, right?
 Now you can either leave it like this or round off the corner’s. To do that, just use a small bottle cap and use a utility/x-acto knife to round them. I personally feel the rounded corners are more pleasing to the eyes. And apparently Google agrees with my theory on rounded corners! I love Google ! It justifies your thinking at the touch of a button!
  Anyway, lets move on to the next step.
Take your elastic cord and loop each end through the top holes as shown below. You should have two long ends of the cord on the inside cover.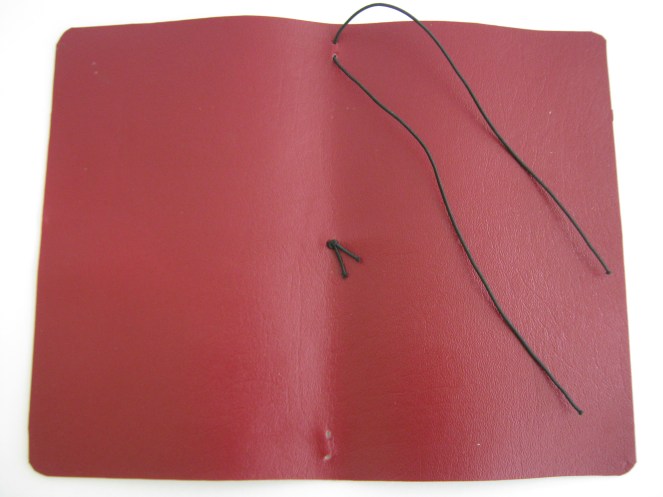 Next take one end and loop it through the two bottom holes.
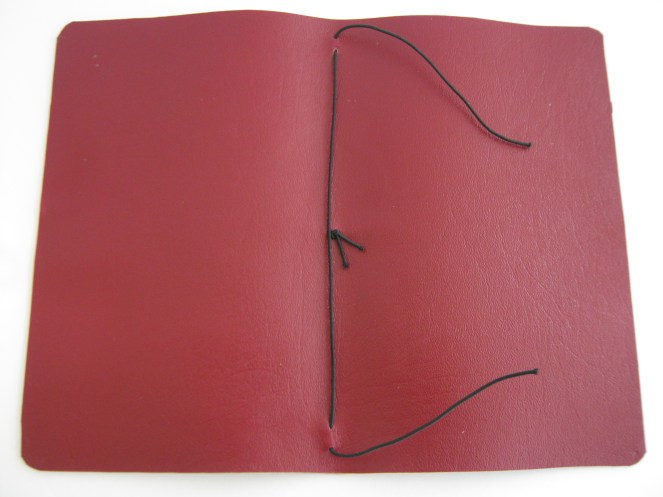 Now you can tie both ends together into a knot but make sure you have a little tension in the cord as shown in the picture below. This makes the notebooks fit snugly inside the cover.
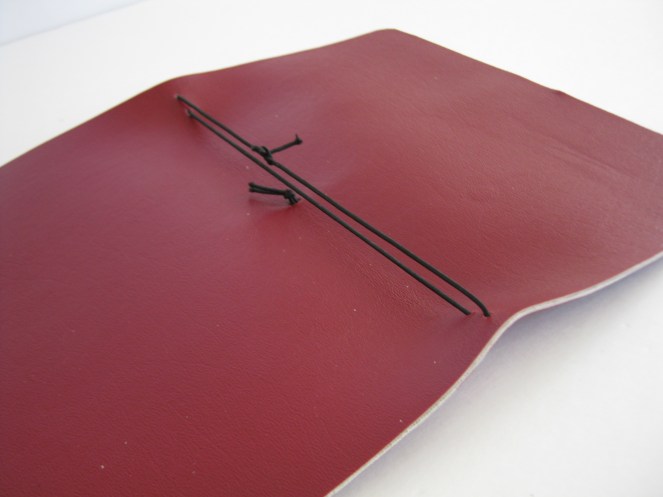 Cut an 11″ piece of cord into a loop and tie a knot. Push the loop through the middle hole and pull it from the outside. This is your closure for the cover.
Don’t worry, you’re nearly done!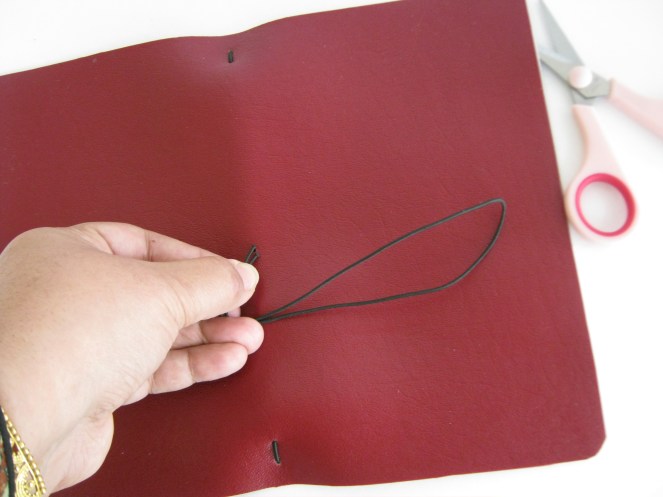 Now grab your notebook and slip one cord to the center of the notebook. Repeat this step with the other cord and notebook. You now have two notebooks side by side .Voila! You are done! You can now close the cover with your elastic band.


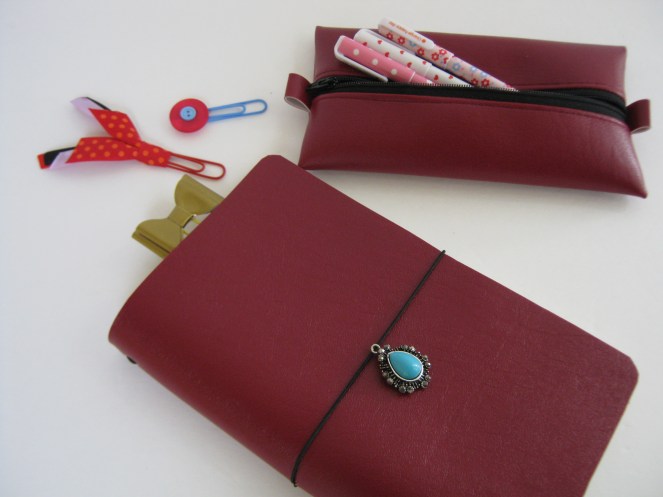
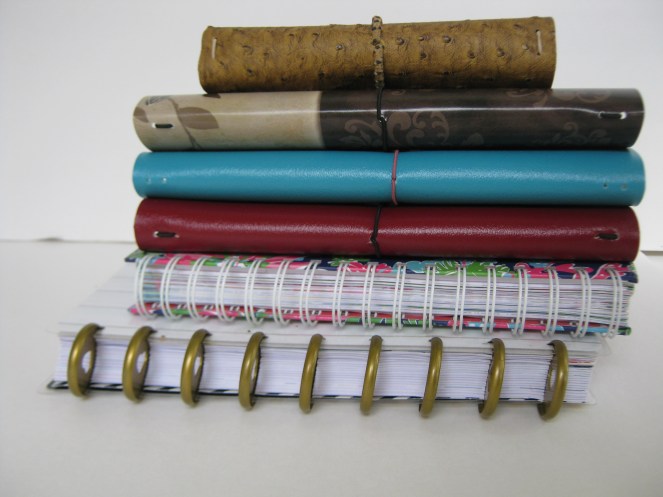
I added a charm to mine, because, why not! I also had some material left over so I made a matching pencil case to go with my new TNB (I will put up a tutorial for it soon!) Don’t they look gorgeous together!!
 I now own quite a few Planners and Traveler’s Notebooks . At this rate I’m sure I will need a planner, to organize my planners!!
With the New Year approaching I hope I’ve inspired you to try this simple planner/journaling system.
To be further inspired, check out my Traveler’s Notebooks on my Facebook page.


Congratulations for your blog😊
And what a great way to start…..
a DIY Planner! Easy to do steps!Very very innovative.
Looking forward to future projects!
Best of luck!
LikeLike
Thank you for your encouragement and support! I’A I plan to upload regularly so be sure to follow.
LikeLike
wow ! I am impressed ,u made it so easy for us to make one.thanks looking forward to follow!
LikeLike
Thank you Saba! your support means a lot!
LikeLike
Congrats sis! Love💕 love 💕love 💕ur Blog.Wishing you all the success.💃💃
LikeLike
Thank you ,my biggest fan and supporter!!
LikeLike
Congrats Khala on ur blog!!!😘❤️Wish u all the best❤️😘
LikeLiked by 1 person
Thank you!! I will be putting up more planner related diy’s for you to enjoy, so keep checking !
Hugs!
LikeLike
Yayyyy!!!❤️💖😘
LikeLike
Congratulations Nazia on achieving this milestone in your life. Wishing you all the success in your new blog loved your planner tutorial will definitely be your follower as am anavid crafter myself. Lots of love and wishes for you
LikeLike
Thank you Samia!
LikeLike
Wanna say welcome to a new blogger who is very dear to my heart and looking forward to follow ur creative world….love
LikeLiked by 1 person
Hi Nazia
Many congrats on your 1st blog. I m always inspired by you.
You r the most talented women. .
Wish you all the best.
Love you.
Farhana
LikeLike
Wonderful Blog Nazia. Beautifully done !!
LikeLike
Thank you!! 😊 Make sure you follow!
LikeLike
Well done Nazi!
Looking forward to future installment
Lots of love
LikeLike
Very nice blog post. I certainly love this site. Keep writing!
LikeLike
Thank you!
LikeLike